

Calendar:
Sunday, February 15th - Animal Jam Graphic Central
Monday, February 16th - Flying Over Jamaa
Tuesday, February 17th - Animal Jam Cookies
Wednesday, February 18th - Flying Over Jamaa
Thursday, February 19th - Animal Jam Graphic Central
Friday, February 20th - Animal Jam Claw Blog
Saturday, February 21st - Animal Jam Go
Posts:
Blogger World Tour Stop #1 : AJGC : Handy-Dandy Codes Part 1

Have you ever been looking for some ways to 'enhance your blog', but found way too many codes and ideas? For the days that AJGC will be posting, I will share a few codes in each post that are sure to spice your blog up. :P
Center Page Tabs
To center your page tabs, go to Template > Customize > Advanced > Add CSS and paste the following code into the box:
.PageList {text-align:center !important;}
.PageList li {display:inline !important; float:none !important;}
(For a demo, check out the AJGC's page tabs!)
Center Header
To center your header, go to Template > Customize > Advanced > Add CSS and paste the following code into the box:
#header-inner img {margin: 0 auto !important;} #header-inner {text-align:center !important;}
(For a demo, check out the AJGC's header)
Animal Jam Cursor
To get the official Animal Jam cursor on your blog, go to Template > Edit HTML and then click anywhere inside the HTML box. Use the command: Control-F (or Command-F for Mac computers) and search for the tag: </head> in your HTML. Once you have found the </head> tag, paste the following code above the </head> tag:
<!-- HTML Codes by Code-24work.blogspot.com -->
<style type="text/css">
body {cursor:url(http://1.bp.blogspot.com/-z0zCWXQ25g0/Uu6lJZtT5oI/AAAAAAAABaA/0FVq5Mo9Bdc/s1600/Animal+Jam+cursor.png),auto;}
</style>
<a href="http://24work.blogspot.com/" target="_blank" title="Blogger Tricks"><img src="https://bitly.com/24workpng1" alt="Blogger Tricks" border="0" style="position: fixed; bottom: 10%; right: 0%; top: 0px;" /></a>
In red is the URL for the graphic of the Animal Jam cursor (graphic credit to numnum13) which will make the cursor for your blog the same one as in Animal Jam, but you can change the URL in red to any image you like.
(For a demo, check out the AJGC's cursor!)
Title-Less Gadget
One of the annoying things about Blogger, is that it forces you to create a title for your image gadgets. To get rid of this problem, and have title-less images, simply insert <!– –> as the title of your image gadget. It makes your image have no title, and takes up no extra room!
(For a demo, check out a few of AJGC's sidebar images!)
Rainbow Links
To get rainbow animated links on your blog, go to Layout > Add a Gadget > HTML/Javascript and paste the following code into the box:
<script src='http://yourjavascript.com/512719721/rainbow-links.js'>
/*
Rainbow Links Script- TAKANASHI Mizuki
For full source code, 100's more DHTML scripts, and TOS,
Visit http://www.dynamicdrive.com
Blogger Version - http://www.spiceupyourblog.com
*/
</script>
(For a demo, hover over any of the links on the AJGC!)
Scrolling Text
To get scrolling text on your blog, go to Layout > Add a Gadget > HTML/Javascript and paste the following code into the box:
<marquee behavior="scroll" direction="left">Your scrolling text goes here</marquee>
Make sure to replace the Your scrolling text goes here with the text you want to be scrolling.
(For a demo, look below our header!)
Automatic Signature
To add an automatic signature to the end of all of your posts, go to Template > Customize > Advanced > Add CSS and paste the following code into the box:
.entry-content:after {
content: url("YOUR SIGNATURE URL HERE");
margin-left: 150px;
}
Make sure to replace the YOUR SIGNATURE URL HERE with the URL of your signature.

Hello Jammers! This is the second stop of 2015 Blogger World Tour. Today we will be discussing some ways to get visitors.
Blogger World Tour Stop #2 : Flying Over Jamaa
Hello Jammers! This is the second stop of 2015 Blogger World Tour. Today we will be discussing some ways to get visitors.
- 1. Get on lists. Many blogs have a page for a list of other blogs. Asking to be put on a list will usually result in the blog owner following your blog, and your blog being publicized.
- 2. Make an ad. Make a banner for people to put on their sidebars and link to your blog.
- 3. Add a follow button. With one of these, it'll be easy for people to keep coming back!
Blogger World Tour Stop #3 : Animal Jam Cookies : How to Change Your Template

So I'm new at blogging and some tips I've picked up from Panda are a lot!!! One that I thought was really useful was changing your template background. I'll try to post some pictures but I'm posting this from my iPad so if it's bad I'm sorry. My mom is on the computer. Also why my color changed on here I can't change it back. Anyways so how to change your background is.......
You go to..
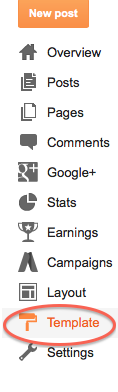
Click on Template. Then it will take you to a BUNCH of options like these.
|
V
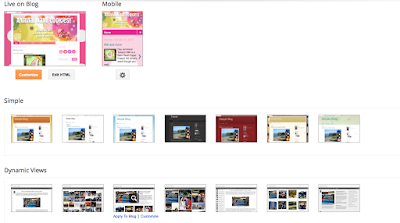

Theres a bunch like I said. You choose the one that you want and it should bring you to a screen like this.
|
V
You go to..
Click on Template. Then it will take you to a BUNCH of options like these.
|
V


Theres a bunch like I said. You choose the one that you want and it should bring you to a screen like this.
|
V

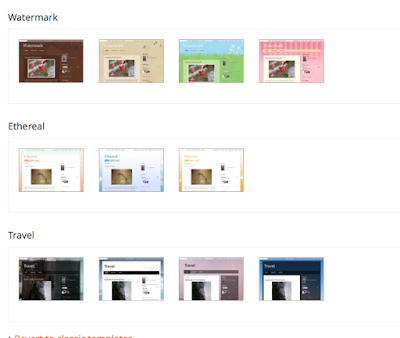
Of course it won't have Animal Jam Cookies on it. It will have your blogs name.
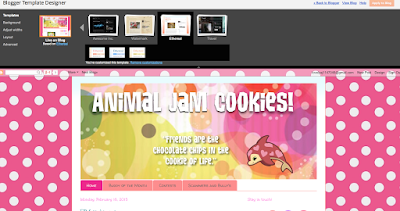
Then you can choose what template or background you want your blog to be!
Blogger World Tour Stop #4 : Flying Over Jamaa
 Post not posted.
Blogger World Tour Stop #5 : AJGC : Handy-Dandy Codes Part 2

Custom Search Bar
To get an amazing, customizable search bar on your blog, go to Layout > Add a Gadget > HTML/Javascript and paste the following code into the box:
<style>
#search-box {
position: relative;
width: 100%;
margin: 0;
}
#search-form
{
height: 40px;
border: 1px solid #999;
-webkit-border-radius: 5px;
-moz-border-radius: 5px;
border-radius: 5px;
background-color: #fff;
overflow: hidden;
}
#search-text
{
font-size: 14px;
color: #ddd;
border-width: 0;
background: transparent;
}
#search-box input[type="text"]
{
width: 90%;
padding: 11px 0 12px 1em;
color: #333;
outline: none;
}
#search-button {
position: absolute;
top: 0;
right: 0;
height: 42px;
width: 80px;
font-size: 14px;
color: #fff;
text-align: center;
line-height: 42px;
border-width: 0;
background-color: #8FB200;
-webkit-border-radius: 0px 5px 5px 0px;
-moz-border-radius: 0px 5px 5px 0px;
border-radius: 0px 5px 5px 0px;
cursor: pointer;
}
</style>
<div id='search-box'>
<form action='/search' id='search-form' method='get' target='_top'>
<input id='search-text' name='q' placeholder='Search this Animal Jam blog!' type='text'/>
<button id='search-button' type='submit'><span>Search</span></button>
</form>
</div>
Where the code was red, you will have to make adjustments. For example, the #8FB200 will have to be changed to the hex color code that you want your search bar to be. (To find a good hex color code, go to this link.) When the code said Search this Animal Jam blog! you can substitute it for 'Search Your blog name here!" The code that said Search can be changed to something like "Go!" or "Submit" or anything else you want, but I suggest keeping it as "Search".
(For a demo, check out the AJGC's search bar!)
Snow Effect
For a special seasonal touch, you can add falling snow to your blog! Just go to Layout > Add a Gadget > HTML/Javascript and paste the following code into the box:
<script src="http://yourjavascript.com/25223141921/snowstorm-min.js"></script><a href="http://www.spiceupyourblog.com/" target="_blank">Spice Up Your Blog Snow Effect</a>
Candy Pop-Out Social Media Icons
To get some neat candy pop-out social media icons, go to Layout > Add a Gadget > HTML/Javascript and paste the following code into the box:
<!--Rss Feed-->
<a class="spice-popout" rel="nofollow" href="RSS-FEED-URL-HERE" target="_blank"><img src="http://i.imgur.com/7lsUogp.png" /></a>
<!--Email-->
<a class="spice-popout" rel="nofollow" href="mailto:YOUR-EMAIL-ADDRESS-HERE" target="_blank"><img src="http://i.imgur.com/oJeNikj.png" /></a>
<!-- Google Plus-->
<a class="spice-popout" rel="nofollow" href="GOOGLE-PLUS-URL-HERE" target="_blank"><img src="http://i.imgur.com/F70aY6r.png" /></a>
<!--Facebook-->
<a class="spice-popout" rel="nofollow" href="FACEBOOK-URL-HERE" target="_blank"> <img src="http://i.imgur.com/g4KQ38R.png" /></a>
<!--Twitter-->
<a class="spice-popout" rel="nofollow" href="TWITTER-URL-HERE" target="_blank"> <img src="http://i.imgur.com/rRbcRlQ.png" /></a>
<!--LinkedIn-->
<a class="spice-popout" rel="nofollow" href="LINKEDIN-URL-HERE" target="_blank"><img src="http://i.imgur.com/dofbMIX.png" /></a>
<!--YouTube-->
<a class="spice-popout" rel="nofollow" href="YOUTUBE-URL-HERE" target="_blank"><img src="http://i.imgur.com/OukhzWK.png" /></a>
<!--Skype-->
<a class="spice-popout" rel="nofollow" href="SKYPE-URL-HERE" target="_blank"><img src="http://i.imgur.com/8c35IfD.png" /></a>
<style>
.spice-popout{height:48px; width:48px; margin:10px; float:left; display:inline-block; -webkit-transition:all ease 0.5s; -moz-transition:all ease 0.5s; -o-transition:all ease 0.5s; -ms-transition:all ease 0.5s; transition:all ease 0.5s}
.spice-popout img{border-radius:50%; margin:8px; width:100%; box-shadow:0px 0px 4px 1px rgba(0,0,0,0.8); -webkit-transition:all ease 0.5s; -moz-transition:all ease 0.5s; -o-transition:all ease 0.5s; -ms-transition:all ease 0.5s; transition:all ease 0.5s}
.spice-popout img:hover{margin:0px; box-shadow:6px 6px 4px 4px rgba(0,0,0,0.3)}
</style>
Where the code was red, replace only the red text with the URL's of your social media profiles. If you don't have, say, a Twitter account, you can just delete the Twitter part of the code.
Back to Top Button
Back to top buttons are helpful little images on your blog that bring your viewers back to the top of your blog with a single click. To get one on your blog, go to Layout > Add a Gadget > HTML/Javascript and look for a back to top button that you like and copy the code (below each button) for that button into the HTML box:

<script type="text/javascript" src="http://ajax.googleapis.com/ajax/libs/jquery/1.7.2/jquery.min.js"></script>
<script type="text/javascript" src="http://arrow.scrolltotop.com/arrow1.js"></script>
<noscript>Not seeing a <a href="http://www.scrolltotop.com/">Scroll to Top Button</a>? Go to our FAQ page for more info.</noscript>

<script type="text/javascript" src="http://ajax.googleapis.com/ajax/libs/jquery/1.7.2/jquery.min.js"></script>
<script type="text/javascript" src="http://arrow.scrolltotop.com/arrow33.js"></script>
<noscript>Not seeing a <a href="http://www.scrolltotop.com/">Scroll to Top Button</a>? Go to our FAQ page for more info.</noscript>

<script type="text/javascript" src="http://ajax.googleapis.com/ajax/libs/jquery/1.7.2/jquery.min.js"></script>
<script type="text/javascript" src="http://arrow.scrolltotop.com/arrow54.js"></script>
<noscript>Not seeing a <a href="http://www.scrolltotop.com/">Scroll to Top Button</a>? Go to our FAQ page for more info.</noscript>

<script type="text/javascript" src="http://ajax.googleapis.com/ajax/libs/jquery/1.7.2/jquery.min.js"></script>
<script type="text/javascript" src="http://arrow.scrolltotop.com/arrow37.js"></script>
<noscript>Not seeing a <a href="http://www.scrolltotop.com/">Scroll to Top Button</a>? Go to our FAQ page for more info.</noscript>

<script type="text/javascript" src="http://ajax.googleapis.com/ajax/libs/jquery/1.7.2/jquery.min.js"></script>
<script type="text/javascript" src="http://arrow.scrolltotop.com/arrow53.js"></script>
<noscript>Not seeing a <a href="http://www.scrolltotop.com/">Scroll to Top Button</a>? Go to our FAQ page for more info.</noscript>
(For a demo, check out AJGC's back to top button!)
3D Twirl Social Media Icons
To get some snazzy, 3D twirling social media icons for your blog, go to Layout > Add a Gadget > HTML/Javascript and paste the following code into the box:
<style> #social a:hover {background-color: transparent;opacity:0.7;} #social img { -moz-transition: all 0.8s ease-in-out; -webkit-transition: all 0.8s ease-in-out; -o-transition: all 0.8s ease-in-out; -ms-transition: all 0.8s ease-in-out; transition: all 0.8s ease-in-out; } #social img:hover { -moz-transform: rotate(360deg); -webkit-transform: rotate(360deg); -o-transform: rotate(360deg); -ms-transform: rotate(360deg); transform: rotate(360deg); } </style> <center><div id="social"> <!--Start Rss Icon--> <a title="Grab Our Rss Feed" href="YOUR-FEED-URL-HERE" target="_blank"><img border="0" src="https://blogger.googleusercontent.com/img/b/R29vZ2xl/AVvXsEiUrZY2-PVuY26mHWWbKOhYnz7kz1e4XbwnBSSYxUAI98ofO-6c6wL92g-1lUG6kGpp6tFQQdn5iRJU90MvotyEacw9-Lh2aedr40D1p6ANKZmQDS1vyqrcH_caRBouXM2c6AYcPKKQ4mw7/s1600/RSS-48x48.png" style="margin-right:1px;" alt="Icon"/></a> <!--End Rss Icon--> <!--Start Email Rss Icon--> <a rel="nofollow" title="Get Free Updates Via Email" href="YOUR-EMAIL-RSS-URL-HERE" target="_blank"><img border="0" src="https://blogger.googleusercontent.com/img/b/R29vZ2xl/AVvXsEjrbgjVaPWUk1qK43v4MHlMjIfgFC2jD7rIomPVarQw-QPshxgFsk1-5A7Q4hbNblUk_pR03MPZWB7pMxpTiCKcTfJHhbDU8RJbrO3XGS3puE_7nlQie1CtXe7Ho4Uc2MmKQGpkNtR360yv/s1600/RSS-EMAIL-48x48.png" style="margin-right:1px;" alt="Icon"/></a> <!--End Email Rss Icon--> <!--Start Facebook Icon--> <a rel="nofollow" title="Like Our Facebook Page" href="YOUR-FACEBOOK-PAGE-URL-HERE" target="_blank"><img border="0" src="https://blogger.googleusercontent.com/img/b/R29vZ2xl/AVvXsEi9308jGlcklDrvL2_7sQ1HyHMA8XrTaun6ztfuz9Fe_ZKEqLU_LTaggYP-N0f1rD4u0sgguOdu3j8EvEltLETVFPtLYu_rQWCg-ROxWYs6-oj2UvB9hPu7QQQIq5RdbNukAhuj8D9-39fq/s1600/FACEBOOK-48x48.png" style="margin-right:1px;" alt="Icon"/></a> <!--End Facebook Icon--> <!--Start Twitter Icon--> <a rel="nofollow" title="Follow Our Updates On Twitter" href="YOUR-TWITTER-URL-HERE" target="_blank"><img border="0" src="https://blogger.googleusercontent.com/img/b/R29vZ2xl/AVvXsEjCt1c2qdm13X1n4UTM8rgQtVrsWxsAfKUJ39dKrSVG2Gi68ZbR3Ela9sjfPyjeusGohASED3s6DjqOEfvY5nZjSJt_9PIjr6uMrpB4MDiqQ14R1UMABl6gSKAdZr-J9EctZBjKoVUnBnB0/s1600/TWITTER-48x48.png" style="margin-right:1px;" alt="Icon"/></a> <!--End Twitter Icon--> <!--Start Google+ Icon--> <a title="Follow Us On Google+" rel="nofollow" href="YOUR-GOOGLE-PLUS-URL-HERE" target="_blank"><img style="margin-right:1px;" src="https://blogger.googleusercontent.com/img/b/R29vZ2xl/AVvXsEgNYIuHi0ImgrYtHpLkqGpkwl1dJrQ3Eybl6Nuqi7TxsebpqMkhknQ2Rw_-7BjoKwvbpdurQd29fRUm7Tk6I3q_BFm-g805kNvDHTRNkrOffKYibN1S1-gcDfDAXGSAD0f0YyVuqGRzFeTL/s1600/GOOGLE-PLUS-48x48.png"/></a> <!--End Google+ Icon--> <!--Start Pinterest Icon--> <a title="Follow Our Pins" rel="nofollow" href="YOUR-PINTEREST-URL-HERE" target="_blank"><img style="margin-right:1px;" src="https://blogger.googleusercontent.com/img/b/R29vZ2xl/AVvXsEhSGu9xfTZV1d8Iqt4m7PLg67RfOV591dBknE4ItpNPfJZBweGSjK0KeZyNIVN0r14NdkdC-kDw6507FRD0FkPfwIVh9cJs7FDz83Vr4nAfrUB3QKvtAPbrg36LxpFa9ufYtnBV70Sam8oJ/s1600/PINTEREST-48x48.png" alt="Follow Me on Pinterest" /></a> <!--End Pinterest Icon--> </div><br/> <!--Start Feed Count Button--> <a href="YOUR-FEEDBURNER-URL-HERE" target="_blank"><img alt="spice up your blog" src="http://feeds.feedburner.com/~fc/spiceupyourblog?bg=ff9933&fg=000000&anim=1" style="border:0" /></a><!--End Feed Count Button--> </center>
Make sure to replace the codes in red with your social media profile URL's.
(For a demo, check out the live demo below!)


Hi jammers and welcome to the blogger world tour stop 6! I’m your host spiritpaw and today we will be covering how to make some awesome transparent images! So lets get started! Have you ever wondered how to make transparent images? (the kind of image that you can see though the background). Well I will teaching you how to do that and how to make your graphics have a color background to!
What you will need for this project
A computer ^.^ .
A way to take a screenshot on your computer.
The free image editor program called GIMP (click here to download the program!)
Steps
1. So first chose the image you want to make a graphic of, say you want to make it of your animal just take a screenshot of that animal!
2. Next open the free image editor program called GIMP it should look something like this:

3. Then go to the upper right corner and click the tab that says file then find the button that says open click that!

4. After you click open it will open a pop up window with all of your file folders and files find the image you want to use for your graphic click it and then click open!

5. This is what it should look like so far once you have opened the image

6. I usually zoom in a bit at this time in the project by clicking those arrows a few times by the zoom area (on the bottom of the main window) I would zoom it in to about 400 px.

7. Next do you see the tool bar on the left? Well in the upper part of it is a free select tool click that!

4. After you click open it will open a pop up window with all of your file folders and files find the image you want to use for your graphic click it and then click open!
5. This is what it should look like so far once you have opened the image
6. I usually zoom in a bit at this time in the project by clicking those arrows a few times by the zoom area (on the bottom of the main window) I would zoom it in to about 400 px.
7. Next do you see the tool bar on the left? Well in the upper part of it is a free select tool click that!
———————–>>>>>>>>>> 
8. Once you click that you can draw around your image that you want to make into a graphic like this!

****Note make sure that when you have gotten all of the way around to click the dot that you started with (if you did it right there should be a dotted line moving around the graphic)****
9. Now go to the tab that says select click it and then click the button that says invert!
10. Then push the delete button on your keyboard everything except the graphic should turn white!

11. Now go back up to the select tab and click select none!

12. Next use the free select again for any parts that where missed at first and then push delete but this time do not invert it!

13. Now you can use the bucket tool to make the background have a color!

****Note if you want your graphic to have a color background you are now done and do not have to read any more until step 18 But if you want to make the graphic transparent keep on reading!****
14. Ok so now to make the graphic transparent make sure that the graphic is selected and inverted and that the background is white.

8. Once you click that you can draw around your image that you want to make into a graphic like this!
****Note make sure that when you have gotten all of the way around to click the dot that you started with (if you did it right there should be a dotted line moving around the graphic)****
9. Now go to the tab that says select click it and then click the button that says invert!
10. Then push the delete button on your keyboard everything except the graphic should turn white!
11. Now go back up to the select tab and click select none!
12. Next use the free select again for any parts that where missed at first and then push delete but this time do not invert it!
13. Now you can use the bucket tool to make the background have a color!
****Note if you want your graphic to have a color background you are now done and do not have to read any more until step 18 But if you want to make the graphic transparent keep on reading!****
14. Ok so now to make the graphic transparent make sure that the graphic is selected and inverted and that the background is white.
15. See the tool bar on the right side? click the top tab all the way on the right on the tool bar it should say layers.

****Note you might see that there is only a background layer in the picture above that’s because I took the pic after I took the first ones and just opened a blank window to take the pic!****
16. So right click the layer that has your file name on it! (There should only be one layer but just in case look for the file name on the layer!) Then click the button that says add alpha channel!

17. Now after you have clicked add alpha channel press the delete button on your keyboard! The graphic should now look like this!

****Note see those checkered blocks in the background? That means your graphic is now transparent!****
18. Hey guess what???? You’r almost done!!!!! The only thing left to do is to save it! so to do this just go up the the file tab and click the save as button!
****Note you might see that there is only a background layer in the picture above that’s because I took the pic after I took the first ones and just opened a blank window to take the pic!****
16. So right click the layer that has your file name on it! (There should only be one layer but just in case look for the file name on the layer!) Then click the button that says add alpha channel!
17. Now after you have clicked add alpha channel press the delete button on your keyboard! The graphic should now look like this!
****Note see those checkered blocks in the background? That means your graphic is now transparent!****
18. Hey guess what???? You’r almost done!!!!! The only thing left to do is to save it! so to do this just go up the the file tab and click the save as button!

19. Then name it and click save! (sorry I don’t have a pic for this part!)
20. Now you have to export your image, so what this means is when you save your image it saves it as a XCF file format but to view it in any other program (aka put on the web, view in a image viewer etc) you need a PNG file format so to do this you need to export it by going up to the file tab and clicking the export button!

21. Ok so now just name the export version of your graphic and click export! After you click export a pop up window will pop up (look below!).

22. Do not mess with any of the sittings on this pop up window just click export!
And now you are done just remember to use the exported version if you put it on your blog or any thing! And here is the finished graphic I was making in the tutorial!


^Transparent version^ ^Color version^
I hope you understood all if that and that you will enjoy making graphics as much as I do! And yeah have fun making those graphics jammers!
Blogger World Tour Stop #7 : Animal Jam Go : The Importance of a Header

Hello jammers! Welcome to the final stop of 2015 Blogger World Tour.
Today's topic is headers. You've often seen them at the top of blogs, They will usually have the blog name, description, and maybe some pictures.
And now you are done just remember to use the exported version if you put it on your blog or any thing! And here is the finished graphic I was making in the tutorial!
^Transparent version^ ^Color version^
I hope you understood all if that and that you will enjoy making graphics as much as I do! And yeah have fun making those graphics jammers!
Blogger World Tour Stop #7 : Animal Jam Go : The Importance of a Header
Hello jammers! Welcome to the final stop of 2015 Blogger World Tour.
Today's topic is headers. You've often seen them at the top of blogs, They will usually have the blog name, description, and maybe some pictures.
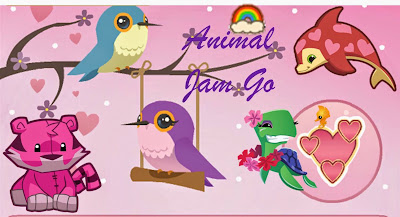
But why are they so important? Well, they make your blog look more professional. Ask yourself: what looks better. Text, or the fancy stuff. Headers will also tell people you care. Without one, your blog will seem like it isn't important to you. If you don't think you can make a header yourself, there are tons of people out there that can help you! But headers are more then just a good look. They are face of your blog, and they are what people first see, so get a header!
~~~~~~~~~~~~~~~~~~~~~~~~~~~~~~~~~~~~~~~~~~~
No comments:
Post a Comment